Cold Foil for Shrink Sleeves: Specification and Trial Guide
Plan the foil, film and print construction around the actual container. Approve the metallic effect after seaming and shrinking, not just on a flat press sample.
Cold foil can add selective metallic decoration to shrink sleeves when the foil, adhesive, inks and film are matched to that construction. The deciding sample is the sleeve after it has been seamed and shrunk onto the intended container. Good transfer on a flat web does not establish that the metallic image will remain acceptable after shrinking.
Before ordering a trial roll, prepare a material brief for the proposed sleeve and agree how the finished package will be assessed. CFS supplies cold foil materials; availability of a suitable shrink-sleeve trial grade must be confirmed for the job.
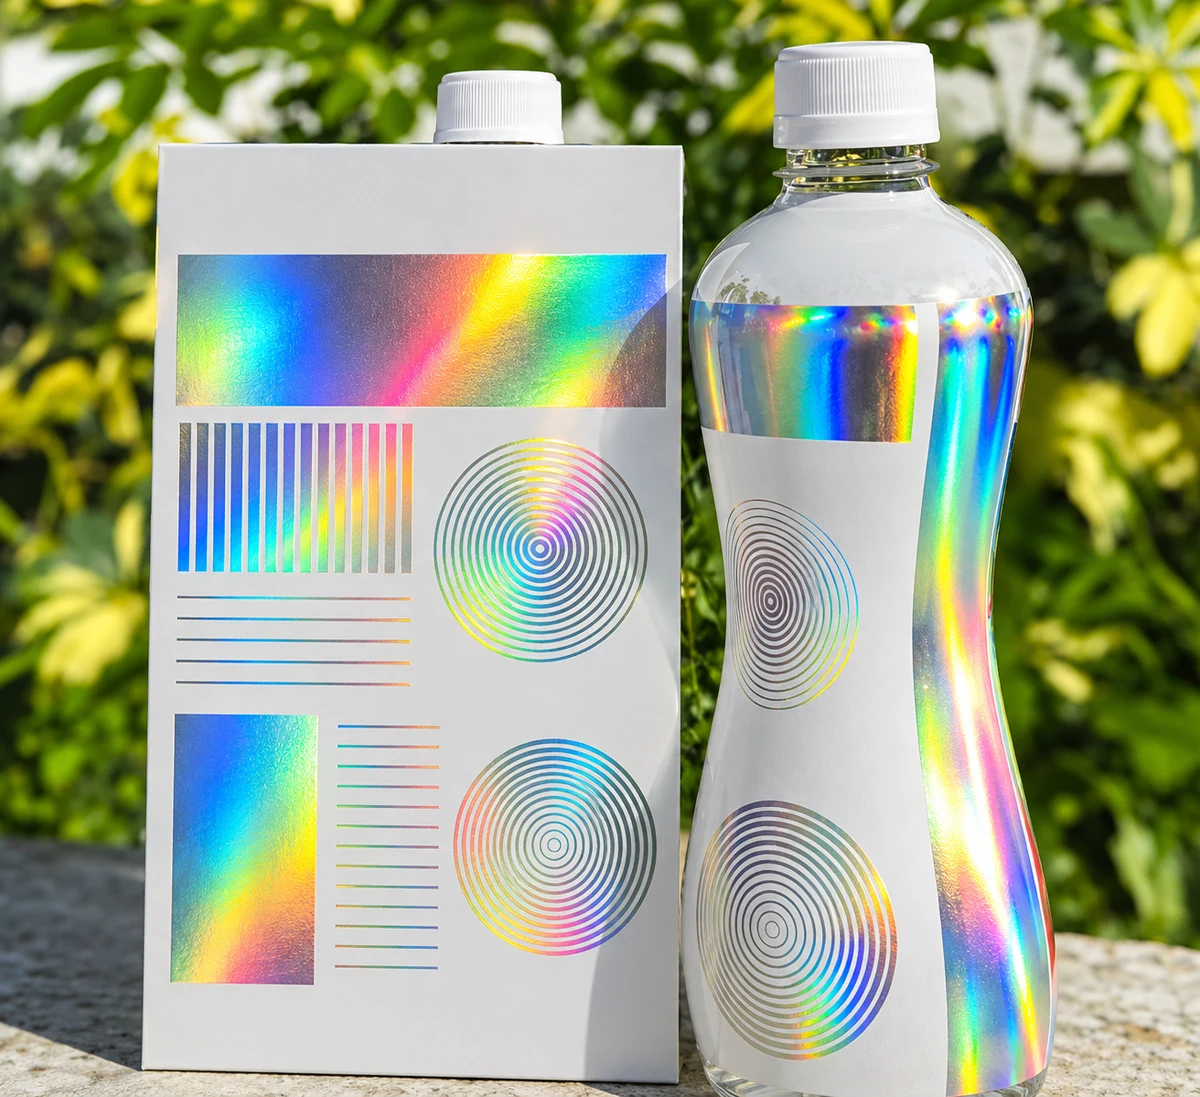
User-supplied appearance example: a flat decorated sample beside a bottle. The image does not establish the film, foil grade, transfer process or completed shrink-trial performance.
It is a grade-specific application, not an automatic extension of a pressure-sensitive label approval. Ask the foil supplier about the film, print side, adhesive system, decoration layout and finished-container requirements before selecting a roll.
UNIVACCO's CF4.6 product description identifies shrink sleeves among that supplier's applications. ITW's CFR2 description specifically discusses the flexibility and second-surface brightness needed for sleeves. These examples show why the grade matters; they do not qualify a CFS product or make different foil grades interchangeable.
In a typical UV flexo arrangement, the press prints an adhesive image, transfers the decoration under the specified contact and curing conditions, and removes the carrier. KURZ's web-fed FAQ explains that transfer process. The foil carrier is not the finished sleeve film. Cold transfer does not need a heated stamping die, but printing and subsequent sleeve shrinking still involve their own thermal conditions.
Choose the film and viewing side together
Identify the film manufacturer and exact grade, rather than requesting approval for "PETG" alone. Include thickness, printable side, coatings or treatment, and the supplier's shrink data with its test conditions. Machine-direction and transverse-direction behavior are separate inputs; neither a material name nor one ultimate shrink figure describes the entire sleeve application.
Klöckner Pentaplast's sleeve-film range includes different films and finishes for container shapes and processing conditions. A choice within that range still needs to be assessed with the decoration. Do not confuse shrink-grade PET or PETG with the PET carrier used to deliver the cold foil.
Cold foil shrink-sleeve construction choices
Construction
Appearance to approve
What to confirm before trial
Surface decoration
Metallic image viewed from the decorated side
Foil grade, protection and behavior through shrinking and handling
Reverse-print decoration
Metallic image viewed through the clear sleeve film
Reverse-print suitability, adhesive clarity and the complete foil/ink/white sequence
Effect required from both sides
Appearance from each specified viewing direction
A grade and construction intended for both views, not an ordinary one-sided sample
The layer order depends on the chosen system and artwork. Mark the viewing side on a construction drawing and have the relevant suppliers review it. For orientation and through-film appearance, use the reverse-print cold foil guide; this sleeve trial must additionally address shrink behavior and converting.
Place the decoration on the container, not just the artwork
Approve metallic areas against the formed sleeve and container geometry. A logo on the body and a broad metallic band over the shoulder can experience different local deformation, even when they came from the same printed web.
UNIVACCO's beverage-sleeve case study advises avoiding foil in high-shrink areas. Start with that limitation in the design discussion. Do not assume a supplier's general shrink-sleeve description allows decoration anywhere on the bottle.
Ask the converter to identify the more demanding regions from its sleeve-development work and propose artwork placement for the trial. Keep a version-controlled distortion file with the artwork. A flat proof shows print registration; the formed sample shows whether lettering, borders and the metallic effect still look right on the container.
Mark the seam overlap and the bonding surfaces on the drawing. Agree where inks, foil, adhesive and coatings may be placed for the selected seaming method. Do not copy a clearance width from an unrelated film or assume decoration in the overlap is harmless. Approve the seam after shrinking as well as before it. Check any barcodes or mandatory information on the finished package, not only on the unformed film.
User-supplied artwork example showing a bottle and matching flat film. Compare decoration placement on the formed container; the image is not evidence of an approved CFS construction or shrink trial.
Match the adhesive, inks and white to the sleeve job
The foil adhesive must form a suitable transfer bond, while the ink and white layers must retain their required appearance and integrity through sleeve conversion and shrinking. A reverse-print design also needs an optically acceptable adhesive and a confirmed viewing-side construction.
White ink is a separate part of the investigation. Flint Group's shrink-white guidance describes cracking and flaking when the ink layer cannot accommodate shrink deformation. A damaged white layer should not automatically be diagnosed as failed metal transfer.
For UV or LED production, confirm compatibility for the exact adhesive and ink grades with the installed sources. "LED-compatible ink" is not approval of the foil adhesive or the complete transfer arrangement. Use the adhesive and LED selection guide for the compatibility brief, and the CMYK over cold foil guide for color and finish checks. Obtain operating conditions from the material and equipment instructions; this page provides no universal curing or coating settings.
Qualify a finished sleeve, not a press swatch
Agree the sample construction, inspection conditions and acceptance criteria before running the trial. The proposed sequence below is a planning workflow, not a standardized test or a completed CFS production qualification.
1Print and transfer
2Slit and seam
3Shrink on container
4Inspect finished sleeve
Proposed qualification workflow; not a record of a completed CFS trial.
1.Retain the printed baseline. Use the proposed film, foil, adhesive, inks and white. Record material lots and applicable press settings. Inspect coverage, fine detail, registration and the required viewing side. Keep identified samples before and after subsequent print operations.
2.Complete the actual converting steps. Slit, seam and form the sleeve using the proposed production route. Examine the overlap, handling marks and any blocking or surface damage. Keep a sample at this stage so later changes can be located.
3.Shrink on the intended container. Use the planned tunnel and application conditions, with the relevant filling state or representative contents. Record the recipe and running conditions used. Follow the film, equipment and converter instructions; a tunnel setpoint alone is not a complete exposure record.
4.Approve the finished construction. Compare metallic continuity, color, white opacity, lettering, seam condition and fit with the agreed reference. Complete the relevant handling and end-use checks after agreed conditioning. Retain the accepted package with its trial record.
Hands-on machine inspection and changes must follow site safety procedures. If the construction changes after approval, assess which parts of the trial need repeating rather than transferring an old approval to the new job.
When the metallic image changes after shrinking
Locate the first stage where the defect appears. Compare retained samples of the same artwork region; several layers can produce a similar-looking fault. The table is a proposed investigation map, not a diagnosis made from appearance alone.
Shrink-sleeve metallic defect investigation map
Observation
Evidence to compare
First investigation
Gaps already present on the flat web
Adhesive image and samples before sleeve converting
Transfer system and print conditions; do not start with the tunnel
Cracking first visible near a shoulder after shrink
Flat sample, formed sleeve and marked container region
Local deformation, decoration placement and the material stack
White flakes while the metallic layer remains
Detached material and retained samples at each operation
White-ink integrity and compatibility rather than assuming foil loss
Reverse-view brightness changes
Views through film before and after forming
Viewing direction, surface condition, layer sequence and deformation
Seam opens or appearance changes at the overlap
Bonding surfaces and seam samples before and after shrink
Seaming materials, decoration placement and the agreed converting conditions
Scratches appear only after application or packing
Samples taken before and after the affected handling step
Contact points and the protection required by the finished design
For transfer faults that are also visible before shrinking, consult the cold foil defects guide. Do not change foil grade, ink, adhesive and tunnel conditions together and then attribute improvement to one of them.
Send CFS a shrink-sleeve project brief
Send the construction before requesting a trial roll. Include the exact film and its technical sheet, a container drawing or sample, and the required viewing side. Mark the metallic areas, seam and distortion version on the artwork. Identify the proposed foil effect, adhesive, ink and white grades, press and curing arrangement, and planned seaming and tunnel process. State the trial-roll format and finished-package checks that matter to the buyer.
Ask CFS whether an appropriate trial foil is available for that construction. Agree the proposed grade and trial format before treating it as a production option. A foil sample is not a finished-sleeve approval; the converter and relevant suppliers still need to confirm the complete package. Food-contact or recyclability claims require applicable evidence for that construction, not just a generic foil or film description.
Can I use the cold foil already approved for clear labels?
+
Do not transfer that approval automatically. Sleeve film, viewing direction, seaming and shrink deformation introduce different requirements. Ask whether the grade is intended for the sleeve construction, then approve the formed package.
Is there a safe shrink percentage for metallic decoration?
+
This guide does not set one. The film's measured shrink behavior, local container shape, decoration position and material stack must be considered together. Get any grade-specific limits from the supplier and verify the proposed design on the actual container.
Does reverse printing remove the need for a shrink trial?
+
No. It changes the viewing and exposure of the decoration, not whether the sleeve and its layers undergo shrinking. Evaluate the image through the film and inspect the complete formed construction, including the white and seam.